Sliding closet doors can significantly enhance the aesthetics and functionality of your bedroom. Not only do they save space compared to traditional swing doors, but they also offer a sleek and modern appearance. Installing sliding closet doors may seem daunting at first, but with some patience and the right tools, you can achieve professional results. This comprehensive guide will take you through each step of the process, ensuring a smooth and successful installation.
Preparing Your Workspace and Gathering Materials
Before diving into the installation process, it’s essential to prepare your workspace and gather all the necessary materials. Clear any furniture or obstacles from the area where you’ll be working to ensure a safe and spacious environment. You don’t want anything in the way when you’re handling tools and large door panels.
Materials you’ll need include the sliding doors themselves, which usually come in kits, tracks (upper and lower), screws, screw anchors, a tape measure, a level, a hacksaw or circular saw (for trimming tracks if necessary), and a screwdriver or power drill. A pencil, stud finder, and a rubber mallet can also be quite handy. Ensuring you have all these supplies on hand can save you numerous trips to the hardware store and help you maintain momentum during the project.
Thorough preparation involves measuring the closet opening accurately. Double-check your measurements to determine that the sliding door kit you purchase is the correct size for your space. Measure both the width and the height of the closet opening. Write down these dimensions and verify them before buying your doors to avoid frustration later.
Removing Existing Doors and Hardware
If you have existing doors on your closet, these will need to be removed before you can install your new sliding doors. Start by taking off any trim or molding around the current doors, if necessary, using a flat pry bar or a trim removal tool. Work gently to avoid damaging the walls or trim pieces that you might want to reuse.
Next, remove the doors by unscrewing the hinges or, in the case of older sliding doors, by lifting them out of their tracks. You might need a helper if the doors are particularly heavy or awkward to handle. If there are remaining nails, screws, or other hardware pieces in the doorway frame, make sure to remove these as well.
Once the old doors are out of the way, inspect the frame for any damage or wear that might need repairing before installing new doors. If there are any dents, chips, or uneven surfaces, now is the time to address them. Sand down rough spots and fill in holes or gaps with wood filler or caulk, then allow it to set and dry as per the product instructions.
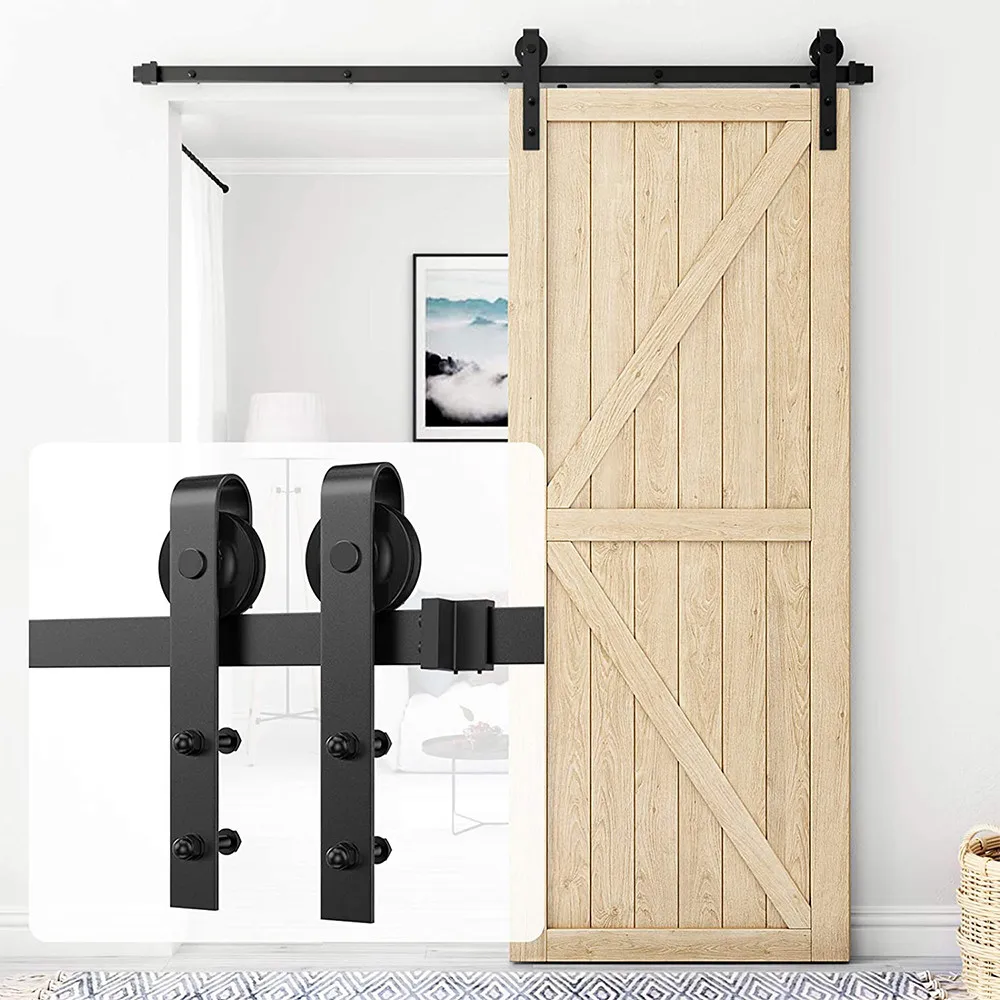
Assembling the Sliding Door Track System
The track system is a critical component of your sliding closet doors. Begin by assembling the tracks according to the manufacturer’s instructions. Often, the kit will come with separate upper and lower tracks that need to be measured and cut to fit your closet’s dimensions. Use a hacksaw or a circular saw to trim the tracks if necessary, ensuring smooth and straight cuts.
Position the upper track first, as it will bear the weight of the doors. Use your pencil to mark where the screws will go, and drill pilot holes for the screws to ensure they go in straight and don’t split the wood. Make sure the track is level before securing it in place, as an uneven track will cause the doors to hang crookedly and slide improperly.
Once the upper track is securely installed, move on to the lower track. Ensure it is perfectly aligned with the upper track so the doors will hang and slide smoothly. Use a level to double-check that everything is straight and even. Attach the lower track to the floor using screws and anchors, if necessary, to ensure it stays firmly in place. This is crucial for maintaining the stability and smooth operation of your sliding doors.
Installing the Sliding Closet Doors
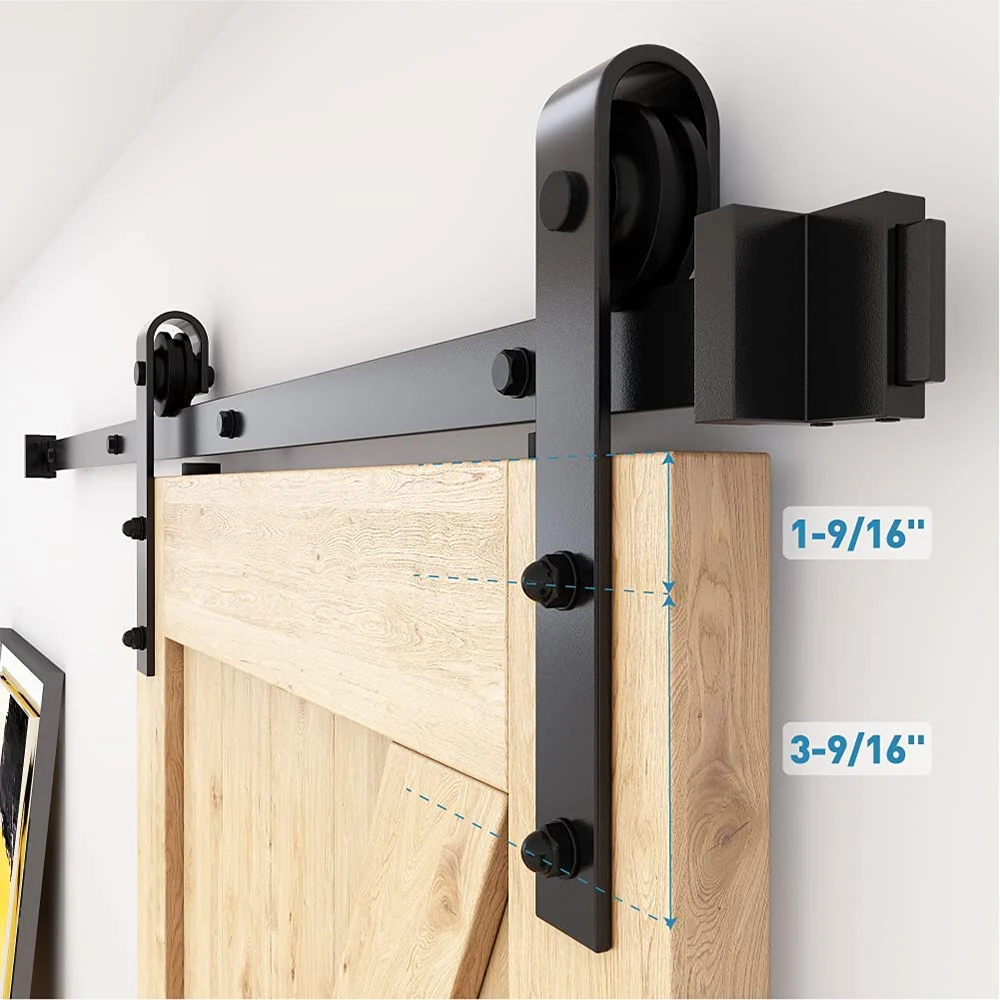
With the tracks in place, it’s time to install the doors themselves. Most sliding door kits include rollers or glides that attach to the tops and bottoms of each door panel. Follow the manufacturer’s instructions to install these components, ensuring they are securely attached and function well.
Lift the first door panel and insert the rollers or glides into the upper track. Tilt the door slightly to manoeuvre the bottom rollers or glides into the lower track. Once the door is in the track, gently slide it back and forth to ensure smooth operation. Repeat this process for the other door panels, making sure each door is correctly aligned and glides smoothly along the track.
It may be necessary to make slight adjustments to the rollers or glides to achieve a perfect fit. Many sliding door systems include adjustable hardware, allowing you to raise or lower each door panel for an even alignment. Check that the doors move freely without sticking or scraping against each other or the track. If you encounter any issues, consult the manufacturer’s instructions for troubleshooting tips or make further adjustments as needed.
Securing and Fine-Tuning Your Sliding Doors
Once your sliding closet doors are installed and operating smoothly, it’s time to secure and fine-tune them for optimal performance. Begin by adding any included stops to the tracks to prevent the doors from sliding too far in either direction. These stops can usually be adjusted to ensure the doors close fully without colliding with the walls or each other.
Next, check the alignment of the doors. They should sit evenly within the track system without any noticeable gaps or uneven edges. If the doors appear misaligned, adjust the rollers or glides as needed to correct the issue. This step is crucial for achieving a professional and polished look.
Consider adding handles or pulls to the door panels for easy operation. Most sliding door kits include handles, but if yours do not, you can easily find compatible options at your local hardware store. Position the handles at a comfortable height, and attach them securely to the door panels using screws or adhesive, depending on the design.
Testing and Final Adjustments
With everything in place, thoroughly test your new sliding closet doors. Slide each door back and forth multiple times to ensure they operate smoothly and quietly. Check for any issues such as sticking, uneven movement, or gaps between the doors. If necessary, make any final adjustments to the rollers, glides, or tracks to resolve these problems.
It’s also a good idea to check the overall stability and durability of the installation. Gently push on the doors to ensure they are securely anchored and do not wobble or come loose from the track system. If you notice any instability, recheck the screws and anchors securing the tracks and make sure they are tightened appropriately.
Finally, stand back and admire your handiwork. Your newly installed sliding closet doors should add both functionality and style to your bedroom, creating a streamlined and organized appearance. Take a moment to appreciate the effort you’ve put into this project, and enjoy the benefits of your enhanced closet space.
Maintenance Tips for Sliding Closet Doors
To keep your sliding closet doors in top condition and ensure they continue to operate smoothly, it’s essential to perform regular maintenance. Dust and debris can accumulate in the tracks, causing the doors to stick or become difficult to slide. Use a vacuum cleaner with a brush attachment to remove dirt and dust from the tracks periodically.
Lubricate the rollers or glides with a silicone-based lubricant to keep them moving smoothly. Avoid using oil-based lubricants, as they can attract dust and dirt, which may cause further issues. Apply the lubricant sparingly, and wipe away any excess with a clean cloth.
Inspect the doors and tracks regularly for signs of wear or damage. If you notice any issues, address them promptly to prevent further problems. Tighten any loose screws, and replace worn or damaged rollers or glides as needed. By staying on top of maintenance, you can prolong the life of your sliding closet doors and maintain their smooth operation.
Conclusion: Enjoying the Benefits of Your New Sliding Closet Doors
Installing sliding closet doors in your bedroom is a rewarding DIY project that can enhance both the functionality and aesthetic appeal of your closet space. By following this step-by-step guide, you can achieve a professional-looking installation and enjoy the benefits of your new doors.
From preparing your workspace and gathering materials to fine-tuning and maintaining your sliding closet doors, each step is crucial to ensuring a successful outcome. With careful planning, attention to detail, and a little patience, you’ll have beautiful and functional sliding closet doors that will serve you well for years to come.